2020-05 edit: Dear reader, we hope you found our post useful. However, since we didn’t update it in quite some time we’d like to advise everybody to take the Docker approach instead. Running this image should work on both Intel/AMD cpu’s and ARM cpu’s like the Raspberry Pi: https://hub.docker.com/r/mbentley/omada-controller. We’re running it ourselves 🙂 Good luck!
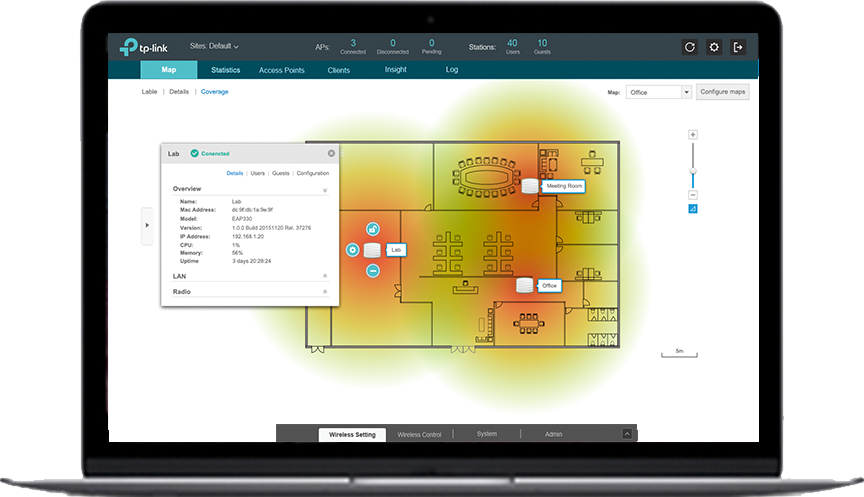
Are you also looking for a way to use the more advanced functions of our TP-Link Omada EAP Series “Business Wi-Fi”?
The Omada Cloud Controller OC200 seems to be a reasonably priced option, but using an idle Raspberry Pi 3 was cheaper. Sadly, TP-Link only provides files to install the EAP Controller software on x64 hardware (and x86 on Windows), while the Raspberry Pi is ARMv8 based:
- Omada_Controller_V3.0.5_Linux_x64.deb
- Omada_Controller_V3.0.5_Windows32bit
- Omada_Controller_V3.0.5_Windows64bit
- Omada_Controller_v3.0.5_linux_x64.tar.gz
Luckily, the TP-Link EAP Controller software uses a combination of Java and MongoDB. Both run just fine on ARM hardware and after some tinkering it turned out quite easy to set up the EAP Controller on the Raspberry Pi. We’ve documented the steps we took. After you’ve unpacked the software it’s just 10 small commands to run, so it should be straightforward enough.
In figuring out the best way to run the software we found a topic at the TP-Link forum. It is a good initiative and an insightful write-up, but it is non-official software. We’re cautious about installing software from people on the internet, so we decided not to use it. We also found a blog post that was very helpful to us. The difference with our method is that the blog post fixes the controller software after the install fails. This while we configure the files before installing (and add privilege separation), which we like a bit better.
Step 0: We assume you’ve already done this
- Download the latest Raspbian Stretch Lite, from the official website.
- Install it on your Raspberry Pi. If you don’t know how, follow the official guide. (We’ve flashed 2018-11-13-raspbian-stretch-lite.img with Etcher)
- Update and configure your Raspberry Pi how you like it.
Step 1: Download and unpack the required software
We’ll run the commands in all steps as root, which is why we start with sudo -i. Also, for some reason TP-Link provides a zipped .tar.gz file. So we’ll have to unzip that before unpacking the .tar.gz file.
sudo -i && cd ~
wget https://static.tp-link.com/2018/201811/20181108/Omada_Controller_v3.0.5_linux_x64.tar.gz.zip
unzip Omada_Controller_v3.0.5_linux_x64.tar.gz.zip
tar -zxf Omada_Controller_v3.0.5_linux_x64.tar.gz
Step 2: Install MongoDB
Now we’ll install MongoDB, remove the included MongoDB and create a symlink to the MongoDB instance we installed.
apt-get install mongodb
rm Omada_Controller_v3.0.5_linux_x64/bin/mongod
ln -s /usr/bin/mongod Omada_Controller_v3.0.5_linux_x64/bin/mongod
Step 3: Install Java
Now we’ll install Java (specifically jsvc) and edit the control.sh file so it does not use the Java and portt software TP-Link included, as these are compiled for the x64 architecture. We’ll also use the client VM, as the server VM is not included in our version of Java.
apt-get install jsvc
sed -i -e 's/JRE_HOME="${OMADA_HOME}\/jre"/JRE_HOME="\/usr\/lib\/jvm\/default-java"/g' Omada_Controller_v3.0.5_linux_x64/bin/control.sh
sed -i -e 's/JAVA_OPTS="-server/JAVA_OPTS="-client/g' Omada_Controller_v3.0.5_linux_x64/bin/control.sh
sed -i -e 's/${PORTT_TOOL} 127.0.0.1 ${HTTP_PORT} 500/netstat -plnt | grep :::${HTTP_PORT}/g' Omada_Controller_v3.0.5_linux_x64/bin/control.sh
Step 3.1: Create Java Symbolic Link
The code alteration we just made assumes /usr/lib/jvm/default-java is a symbolic link to your Java directory. To check if this is the case, we’ll do the following.
cd /usr/lib/jvm
ls -hl
This shows a list of all files and folders located at /usr/lib/jvm. If there is a line “default-java -> ***” line, where *** is your Java installation location, please continue with Step 4. If not, we’ll have to create this symbolic link here:
The output from the previous command should contain at least one folder with a name something like “java-8-openjdk-armhf” or “java-1.8.0-openjdk-armhf”. This is the folder we need to create a symbolic link to. Replace *** in the following command with the name of your Java install folder to create a symbolic link.
ln -s *** default-java
ls -hl
This should now show a line stating “default-java -> ***”, where *** is your Java install directory.
Step 4: Add privilege separation
It’s bad form to run programs with root privileges when they don’t need them. If you wish to run as root you can skip this step, although it is not recommended. This creates the user eapc, whose home will be the directory we’re going to install the EAP Controller in, /opt/tplink/EAPController.
cd ~
adduser --system --disabled-login --group --no-create-home --home /opt/tplink/EAPController --gecos "EAP Controller user" --shell /bin/false eapc
sed -i -e 's/OMADA_USER=${OMADA_USER:-root}/OMADA_USER="eapc"/g' Omada_Controller_v3.0.5_linux_x64/bin/control.sh
sed -i -e 's/chmod 755 ${INSTALLDIR}\/jre\/bin\/\*/chown -R eapc:eapc ${INSTALLDIR}/g' Omada_Controller_v3.0.5_linux_x64/install.sh
Step 5: Install
Now that we installed Java and MongoDB, and configured control.sh and install.sh to use the proper software, we can install the EAP Controller.
cd ~/Omada_Controller_v3.0.5_linux_x64/
./install.sh
After accepting the install directory this runs the installation and starts the software, which can take several minutes. Especially starting the software can take quite some time, although TP-Link did apparently lower the starting time by 30% with v3.0 compared to v2.7.
The result
root@raspberrypi:~/Omada_Controller_v3.0.5_linux_x64# ./install.sh
Omada Controller will be installed in [/opt/tplink/EAPController] (y/n): y
======================
Installation start ...
Install Omada Controller succeeded!
==========================
Omada Controller will start up with system boot. You can also control it by [/usr/bin/tpeap].
Starting Omada Controller....................................................................................................................................................................................tcp6       0      0 :::8088                 :::*                    LISTEN      9684/omada
.
tcp6       0      0 :::8088                 :::*                    LISTEN      9684/omada
Start successfully.
You can browse URL http://localhost:8088 for more.
========================
You can now remove the files used to install the EAP Controller software, and browse to the appropriate IP address at port 8088 to enjoy your newly installed EAP Controller 🙂
Also useful information, to start/stop/check the status of the Omada Controller you can run one of the following commands:
tpeap start
tpeap stop
tpeap status
FAQ: “Cannot locate Java Home” error
If you get the “Cannot locate Java Home” error when starting the Omada Controller, Java cannot be found at “/usr/lib/jvm/default-java”. The easiest fix is to check where your Java install is located and create a symbolic link to that folder.
cd /usr/lib/jvm
ls -hl
This shows a list of all files and folders located at /usr/lib/jvm. There should be at least one folder with a name something like “java-8-openjdk-armhf” or “java-1.8.0-openjdk-armhf”. This is the folder you need to point default-java to. Replace “java-8-openjdk-armhf” in the following command with the name of your Java install folder to create a symbolic link.
ln -s java-8-openjdk-armhf default-java
ls -hl
This should now contain a line stating “default-java -> java-8-openjdk-armhf”. If so, start the Omada Controller:
tpeap start
Useless fact: Not every support page of TP-Link is as up-to-date as another. The English website has version 3.0.5, but the Dutch website has version 3.0.2 of the EAP Controller software even though version 3.0.5 is already almost 2 months old.
56 thoughts on “Installing TP-Link EAP Controller 3.0.5 on a Raspberry Pi”
Hi,
I’m getting a error when installing.
root@raspberrypi:~# sed -i -e ‘s/JRE_HOME=”${OMADA_HOME}\/jre”/JRE_HOME=”\/usr\/lib\/jvm\/default-java”/g’ Omada_Controller_v3.0.5_linux_x64/bin/control.sh
root@raspberrypi:~# sed -i -e ‘s/JAVA_OPTS=”-server/JAVA_OPTS=”-client/g’ Omada_Controller_v3.0.5_linux_x64/bin/control.sh
root@raspberrypi:~# sed -i -e ‘s/${PORTT_TOOL} 127.0.0.1 ${HTTP_PORT} 500/netstat -plnt | grep :::${HTTP_PORT}/g’ Omada_Controller_v3.0.5_linux_x64/bin/control.sh
root@raspberrypi:~# adduser –system –disabled-login –group –no-create-home –home /opt/tplink/EAPController –gecos “EAP Controller user” –shell /bin/false eapc
Waarschuwing: De home-directory /opt/tplink/EAPController die u specificeerde is niet toegankelijk: No such file or directory
Toevoegen systeemgebruiker `eapc’ (Groepsnummer 111)…
Toevoegen nieuwe groep `eapc’ (Groepsnummer 115).
Toevoegen nieuwe gebruiker `eapc’ (Gebruikersnummer 111) met groep `eapc’.
Gebruikersmap `/opt/tplink/EAPController’ is niet aangemaakt.
root@raspberrypi:~# sed -i -e ‘s/OMADA_USER=${OMADA_USER:-root}/OMADA_USER=”eapc”/g’ Omada_Controller_v3.0.5_linux_x64/bin/control.sh
root@raspberrypi:~# sed -i -e ‘s/chmod 755 ${INSTALLDIR}\/jre\/bin\/\*/chown -R eapc:eapc ${INSTALLDIR}/g’ Omada_Controller_v3.0.5_linux_x64/install.sh
root@raspberrypi:~# cd Omada_Controller_v3.0.5_linux_x64/
root@raspberrypi:~/Omada_Controller_v3.0.5_linux_x64# ./install.sh
Omada Controller will be installed in [/opt/tplink/EAPController] (y/n): y
======================
Installation start …
Install Omada Controller succeeded!
==========================
Omada Controller will start up with system boot. You can also control it by [/usr/bin/tpeap].
Starting Omada Controller.Cannot locate Java Home
What i’m doing wrong?
First question: What operation system are you running?
I see two errors in your log.
1. The “No such file or directory” one doesn’t seem like a problem. During the creation of the eapc user the specified home directory does not exist yet and the command is told not to create it. It then states it cannot access the non-existent directory. However, it seems like the eapc user is created and that directory is created later during the installation.
2. Could you check if /opt/tplink/EAPController was created during the installation?
3. The real issue seems to be the “Cannot locate Java Home” message. It looks like the Omada Controller cannot find a Java instance to run from. Did you install jsvc? If not, could you run “apt-get install jsvc” as root and post the results?
Following your steps, first I get “jsvc not found, please install jsvc”, once I install jsvc as root then try to restart service i get the error “Cannot locate Java Home”. Any ideas? I have the latest full raspbian install.
I’ve updated the post with a small FAQ section, let me know if it fixes your issue 😉
I had the “Cannot locate Java Home” error too, I fixed it by correcting the code to match the location of JAVA in Raspbian…
In the following piece of code replace /default-java with /jdk-8-oracle-arm32-vfp-hflt\/jre
sed -i -e ‘s/JRE_HOME=”${OMADA_HOME}\/jre”/JRE_HOME=”\/usr\/lib\/jvm\/default-java”/g’ Omada_Controller_v3.0.5_linux_x64/bin/control.sh
Welllll, I’m fairly certain you didn’t follow the steps above :p I opted for OpenJDK, you have the Oracle version of Java. I assumed “default-java” was created as a symlink to the actual Java install in “/usr/lib/jvm/” for every install, but apparently that’s not the case. I’ve updated the post to take this into account.
Thanks for that “useless” fact at the bottom, gave me a chance to get the latest version.
You’re welcome, less useless than I thought then 🙂
I followed all steps to the letter, from start to finish…, but “Start Failed”, is all I get. No error message. I’ve rebooted to no avail. When I check the status of the controller, it’s not started. tpeap start results in Starting Omada Controller…. (which lasts approx 2 minutes) and then Start failed again.
On what hardware did you run this? And did you copy/paste the commands? Or also follow the text on what parts of the commands have to be edited?
Hi job,
thank you very much for your guide, it worked perfectly on my Raspi 3!
Just a little hint for those (like me) who just copy & paste: In step 3.1 you jump to “/usr/lib/jvm” and in step 5 back to “cd Omada_Controller_v3.0.5_linux_x64/”. Then an error occurs, because the “~/” is missing. Just add it to your path: “cd ~/Omada_Controller_v3.0.5_linux_x64/” and you can almost blindly copy & paste.
Thanks again and best regards
Chris
You’re welcome 🙂
Thanks, I’ve added the ~/ to step 5. I added “cd ~” to step 4 as well, since two of those commands should also be executed from that directory.
I used these instruction to install 3.1.4 on a Debian (Raspbian)/Raspberry Pi 2B and it worked flawlessly. Just replace all 3.0.5 with 3.1.4 in the paths and you are good to go (and I also had to remove a few Chinese characters at the end of the folder name after unpacking).
Thank you guys! You saved me hours of work and frustration.
Starting Omada Controller.Invalid JVM name specified client
I got this error. Can you tell me where im doing wrong? 🙁
It sounds like your JVM (Java Virutal Machine) does not support the client VM, maybe it uses the server VM? You could try to change step 3, so you won’t change the “server” reference into “client” in the control.sh file.
Thanks for your reply. Maybe I got this error bec. I’m using Raspbian stretch with desktop and recommended software that I think has already java installed. I succeeded all the step but have a error :). I will try your advise in step 3. This is my first time using raspberry pi 3b+ and I liked it.
sed -i -e ‘s/JAVA_OPTS=”-client/JAVA_OPTS=”-server/g’ Omada_Controller_v3.0.5_linux_x64/bin/control.sh
That’s the code I need to change?
The line “sed -i -e ‘s/JAVA_OPTS=”-server/JAVA_OPTS=”-client/g’ Omada_Controller_v3.0.5_linux_x64/bin/control.sh” tells control.sh to use the client VM in stead of the server VM. You can just skip that line if your installed JVM supports the server VM.
Tried to follow the instructions to install v3.1.4 on a Raspberry Pi 2B by changing all 3.0.5 to 3.1.4. All steps went okay until the last line: ./install.sh
The error is : -bash ./install.sh: cannot execute binary file: Exec format error
Any idea how to fix it? Thank you
That sounds like you’re trying to install a piece of x86-64 (Intel/AMD) achitecture software on an ARM cpu. That won’t work :p
I tried to install v3.1.4 on a Raspberry Pi 3. All steps went okay, but I’m getting the following error after starting the controller:
Starting Omada Controller. Please wait.Cannot find any VM in Java Home /opt/tplink/EAPController/jre
The /usr/lib/jvm directory:
lrwxrwxrwx 1 root root 24 Jan 6 2017 default-java -> java-1.8.0-openjdk-armhf
lrwxrwxrwx 1 root root 20 Oct 22 2018 java-1.8.0-openjdk-armhf -> java-8-openjdk-armhf
drwxr-xr-x 5 root root 4.0K Apr 23 23:26 java-8-openjdk-armhf
How can I fix this?
Hello I have problem.
Everything went fine until
root@raspberrypi:~/Omada_Controller_v3.1.4_linux_x64# ./install.sh
-bash: ./install.sh: Permission denied
SOLVED
chmod 755 install.sh
hello could someone tell me how to update to V3.1.4
Installation of v3.1.13 on a freeshly installed pi2 went fine using above guide, I do encounter a problem however:
After installation I was able to login to Omada and restore settings from back-up etc.
However, after I rebooted the pi, i was no longer able to login to the webinterface of Omada. Neither from a win 10 pc connected by wire nor from my android phone.
The error message i get is ‘request timed out’
Setting up things via cloud acces using the Omada app on my phone seems to be working fine
Is there some sort of timer i can adjust to solve this maybe?
Hello,
I have a VM probleme when i am starting the tpeap The software say me “Cannot find any wm in java home /usr/lib/jvm/default-java”.
Impossible to find were is the problem. i have tried without the change of the server to client of the point 3, but it’s not working.
My configuration is pi 3+ with java-1.11.0-openjdk-armhf and eap sofware 3.0.5.
can you help me to solved this problem ? Thank you.
Do I have the same problem, any solution?
I am seeing the same issue…
Omada Controller will start up with system boot. You can also control it by [/usr/bin/tpeap].
Starting Omada Controller.Cannot find any VM in Java Home /opt/tplink/EAPController/jre
Also wasn’t working on an Ubuntu x86 machine. On a newer version of Ubuntu it works fine… Not certain what the issue is, though…
Had the same “Cannot find any vm in java home /usr/lib/jvm/default-java” issue as above. Solution that worked for me was to install java 8 instead of 11…
Great work!
Can anybody who success the installation make and copy of her debian/Raspian OS and share it for other people… I think it will very helpfull.
thanks
apt-get install openjdk-8-jre-headless
then run
ln -sfn /usr/lib/jvm/java-8-openjdk-armhf /usr/lib/jvm/default-java
And it would fix the error “Cannot find any vm in java home”
Hi, Trong Tran. I followed your solution to the error problem “Cannot find any vm in java home” and it fixes the issue. Your solution works. Thank you very much
Works! Thank you!
Hello, I have this problem. “Starting Omada Controller.Cannot find any VM in Java Home /usr/lib/jvm/default-java” And the java I have setup like this.
lrwxrwxrwx 1 root root 25 pro 30 2018 default-java -> java-1.11.0-openjdk-armhf
drwxr-xr-x 9 root root 4,0K srp 13 20:02 java-11-openjdk-armhf
lrwxrwxrwx 1 root root 21 čen 16 20:24 java-1.11.0-openjdk-armhf -> java-11-openjdk-armhf
lrwxrwxrwx 1 root root 20 bře 29 14:54 java-1.8.0-openjdk-armhf -> java-8-openjdk-armhf
drwxr-xr-x 7 root root 4,0K srp 13 19:30 java-8-openjdk-armhf
Where it is problem? What commadn can I use to fix it?
Since I’m planning to deploy this to my Raspberry Pi I tried the instructions with the latest version (3.2.1). I had issues which I will add to another comment, but since you are among the top results on Google for Omada controller on Raspberry Pi, so I suggest you do some changes:
1) Add the link to download to the latest version: https://www.tp-link.com/us/support/download/eap-controller/
2) Instead of changing directory to home, change always to ~/Omada_Controller_v3.2.1_linux_x64/ (where the end is the installed version. Therefore, all your sed commands will be relative to the folders inside it, so people like name don’t have to rename Omada_Controller_v3.0.5_linux_x64 all the time
3) Add instructions for installing the openjdk 8 version. It doesn’t work with the 11 version – I tried – and people sometimes don’t know exactly how to do that.
4) Add instructions to select the openjdk 8 as the default java version on Ubuntu: sudo update-alternatives –config java
Nice article though, really helped me.
Hi Luciano,
can you explain what you have exactly done. I’m trying it to install Omada 3.2.1 on my Raspberry but have issues too. Can you post the instructions here. Thank you!
After waiting for several minutes for it to start on an Ubuntu x64 machine, it gives me just a simple error: Start failed. Looking at the server.log, it says “[main] [WARN]-[SourceFile:78] – com.tp_link.eap.start.a.a: Fail to start mongo DB server”. Any ideas to why the mongod might be failing? I will try reinstalling using the supplied mongod version to see if I get different results
OK, found the reason. On x86_64, using the Ubuntu supplied mongod caused errors. Skip step 2 and Stick to the packaged version and it works just fine
Starting Omada Controller.Cannot find any VM in Java Home /usr/lib/jvm/default-java
Omada Controller will start up with system boot. You can also control it by [/usr/bin/tpeap].
Starting Omada Controller.Cannot find any VM in Java Home /usr/lib/jvm/default-java
…………………………………………………………………………………………………………………………………………………………………………………………………………………………………………………………………………..
Start failed.
Hi, thank for your guide.
I installed Omada Controller v3.1.13 follow your guide on pi3 B+.
How do i upgrade to newer version v3.2.1?
Thank you!!!
For those having issues with the latest version I’ve copied and updated this guide with details on how to get it working on 3.2.1
https://blog.jeffery.net.nz/2019/10/omada-controller-on-raspbian.html?m=1
Cool 🙂 Thanks for creating an updated version!
ran through the instructions and install but get the below error:
Installation start …
Install Omada Controller succeeded!
==========================
Omada Controller will start up with system boot. You can also control it by [/usr/bin/tpeap].
/etc/init.d/tpeap: line 20: WORK: command not found
When running tpeap start/stop/status I receive the same error
Any Ideas?
Hi all, here are the manual, how to install Omada Controller v 3.2.6 on RaspBerry Pi, Linux Debian 9/10 etc. It’s 100% working.
apt install jsvc curl net-tools
cd /usr/local/src/
wget https://static.tp-link.com/2020/202001/20200116/omada_v3.2.6_linux_x64_20191220114946.deb
dpkg -i omada_v3.2.6_linux_x64_20191220114946.deb
Hi all,
So I got this to work – a big thank you!
I wanted to know what the steps are to update the controller whenever TPLink issue an update ?
Worked with 3.2.6 with very few modifications to the steps. All I needed was rename the omada SW path as needed and swap Java 11 with Java 8. Without Java 8, I got the error that a VM could not be found. Also, I’ve used the full Raspain Desktop during installation which made copy/paste much easier, but later disabled the GUI with raspi-config for faster boots. I’ve used pi 3, which isn’t super fast, but it was ok with just 2 APs in my setup and approx 30 clients.
Hello,
thank you for your guide. I have already working 3.2.9 controller on RPi . I have found new version 3.2.10. How to update to newer versions. Which steps I have to reproduce or what should I do to retain settings, etc.
The most failsafe:
Controller Settings -> Migrate.
Retained Data Backup -> All Time.
Download the backup file, follow the migration steps and install the new version somewhere.
It should also be possible to update in-place, but I don’t know what exactly changed between the versions and what files you’ll have to replace. Maybe it’s enough to keep the data and keystore folders, but I’m not sure without trying. This is one of the reasons I mentioned the docker solution in the 2020-05 edit 🙂
Has someone tested on Raspberry PI4
Should this also work with this installation-manual?
Dear Job, I found this blog when Googling how to run omada-controller in a docker container on my Raspberry Pi. Following the docker-hub image that you linked in the 2020-05 edit, I get a container that is stuck in a restartloop. Usualy due to a wrong arm-version. I think. But I am to n00b in this “docker-world” to be able to solve it myself. Googling no solution found yet. My question to you, is your configuration still running? Dit you set it up using a Docker-compose.yml or just using docker run? Please help! Thanks in advance, Martijn
Hey Martijn, sorry to hear that. I’ve been running my Docker instances on X86 hardware for some time now, so I can’t help you with your ARM based setup. I’m afraid all I can do is wish you the best in this endeavour.
@sunil and @gouda
May I quickly check. You managed to get this running on raperrian without all the above steps? I still get the VM Error?
Thanks for some input
I managed to install the new 4.1.5 SDN controller on RPi4 using the following commands (on 64bit Ubuntu Server, not 32bit PiOS):
sudo -i && cd ~
wget https://static.tp-link.com/2020/202008/20200805/Omada_SDN_Controller_v4.1.5_linux_x64.tar.gz
tar -zxf Omada_SDN_Controller_v4.1.5_linux_x64.tar.gz
wget -qO – https://www.mongodb.org/static/pgp/server-4.2.asc | sudo apt-key add –
echo “deb [ arch=amd64,arm64 ] https://repo.mongodb.org/apt/ubuntu bionic/mongodb-org/4.2 multiverse” | sudo tee /etc/apt/sources.list.d/mongodb-org-4.2.list
apt-get update
apt-get install openjdk-8-jre-headless
apt-get install mongodb-org
apt-get install jsvc
cd ~/Omada_SDN_Controller_v4.1.5_linux_x64/
bash ./install.sh
This is excellent! I got this working on my piHole 3b. I now have a 2 in 1 device! I can’t wait to do a little more tweaking and getting some vlans setup.
I installed the following Omada_Controller_v3.2.10_linux_x64 by substituting where ever 3.0.5 was. I tried the newer SDN versions first, but don’t really need the newer settings for switches as I’m not using tp-link switches currently. Maybe in the future. I already had the pihole running headless therefore had java already installed. The only real trip up was setting the java symbolic link. I had a brain fart, but got it figured out by looking at the comments and faq!
Thanks again, this was a great write up.
Is there any chance you could send me your mongod executable? I can’t get mine to work due to ubuntu shipping with a newer version of mongod, and I’m stuck with the legacy omada controller due to my hardware..